Minecraft服务器的搭建
前言
本教程采用MCDR框架进行服务器的管理,可兼容多数服务器并且监听服务器事件,同时解决mod和插件共存问题(说的就是你Fabric),教程包含:
- 服务器的搭建
- MCDR的搭建
- 服务器部署到MCDR框架下
- 使用樱花映射允许公网访问
- MCDR插件的使用
- 镜像服/多服务器的跳转(Velocity)
教程使用Windows系统,1.20.2的Fabric服务端,包含mod安装,插件安装。
安装时候如果说一直下一步即可,会默认装在C盘,你可与自行更换安装位置。
Forge和原版均可参照教程进行搭建。
本文只提供Fabric教程,其余均可参照此教程来进行~
创建一个Minecraft服务器
①安装JDK(JAVA)
在提供的页面按需选择你的JDK版本即可,这里我们是1.20.2,需要JDK17,下载完双击打开傻瓜式下一步即可:
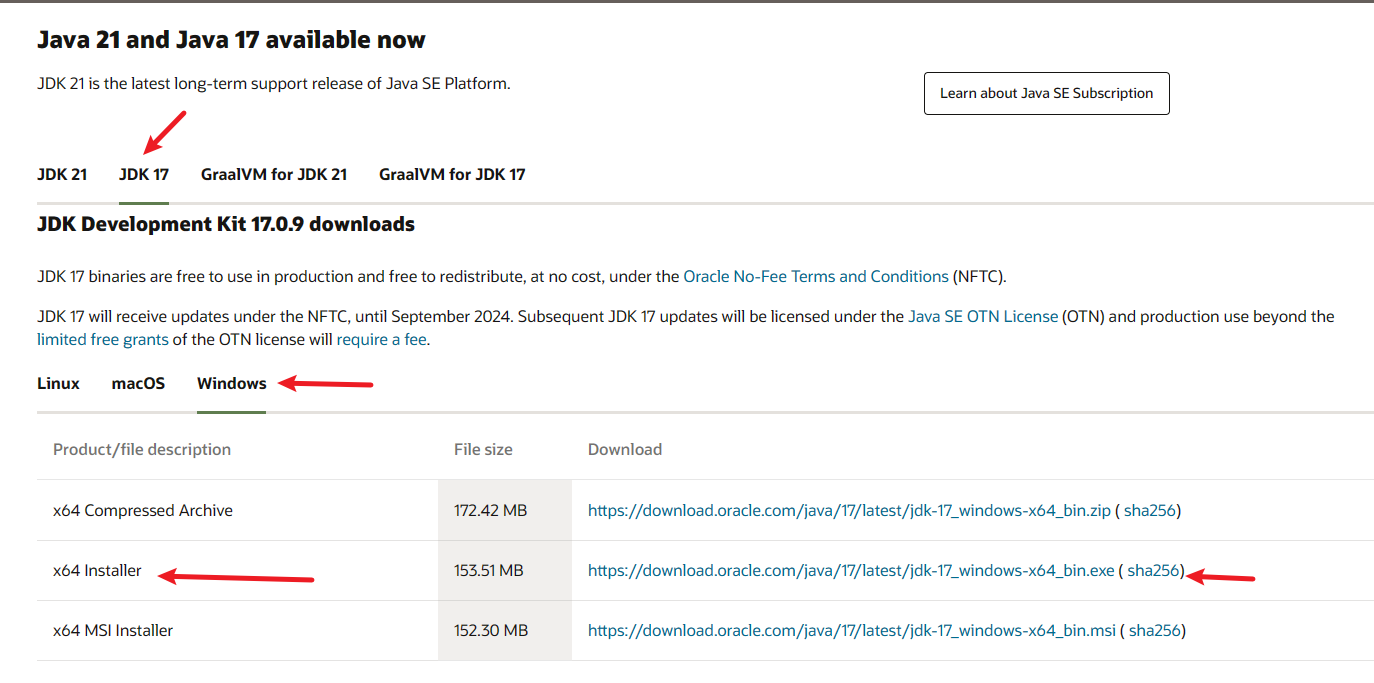
完成后,打开cmd,输入java -version,出现下面字样即为成功

②下载服务器核心(按需)
==注意,如果无法安装,你应当先安装相应版本的原版服务端核心,再进行Fabric或者Forge的安装,切记把你的核心放在一个文件夹内,而不是在桌面==
Fabric:安装Fabric
原版:我的世界中文Wiki
进入维基百科,搜索你要开服的版本,点进去,然后在右侧点击服务端下载即可

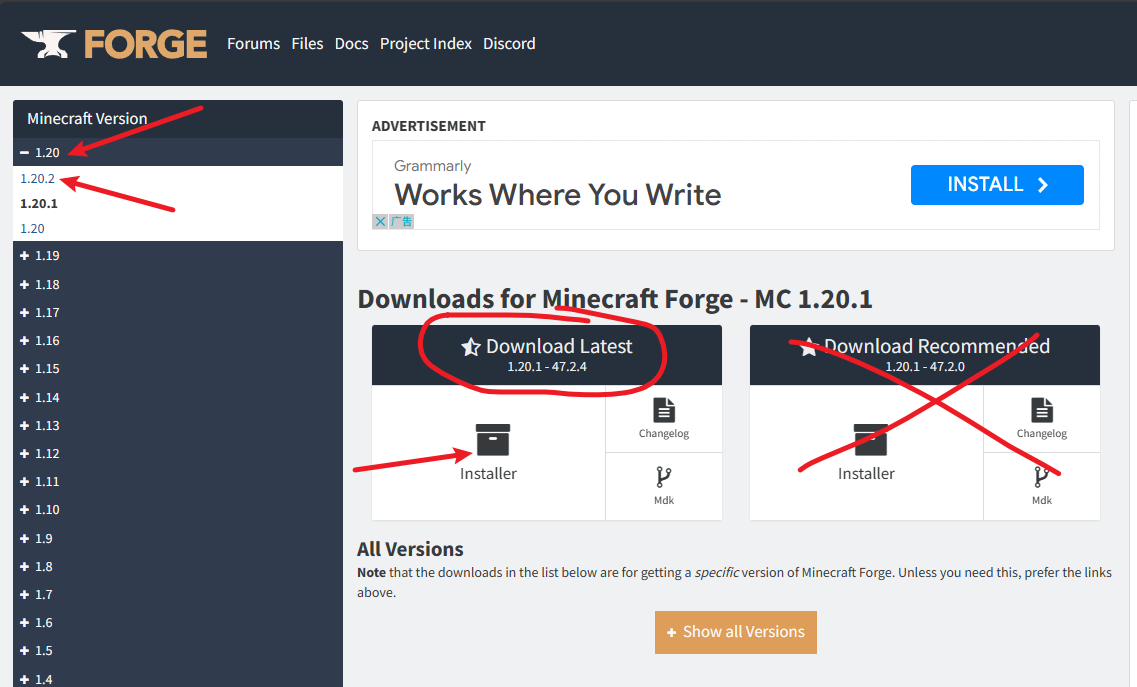
Forge(注意,只是提供下载路径,教程用的是Fabric):安装Forge
③运行
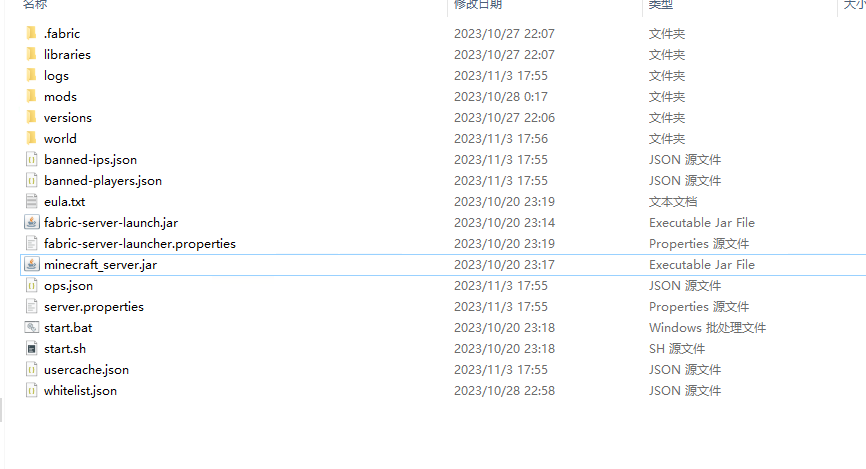
双击下载好的核心,等待运行,之后会闪退,然后你核心所在的文件夹会出现下面的文件(文件不齐也没关系,我这里是大全后的文件,首次你肯定是少文件的!==另外第一次下载的核心会叫server,而不是minecraft_server,为了后续不出问题,你可以跟着改==)
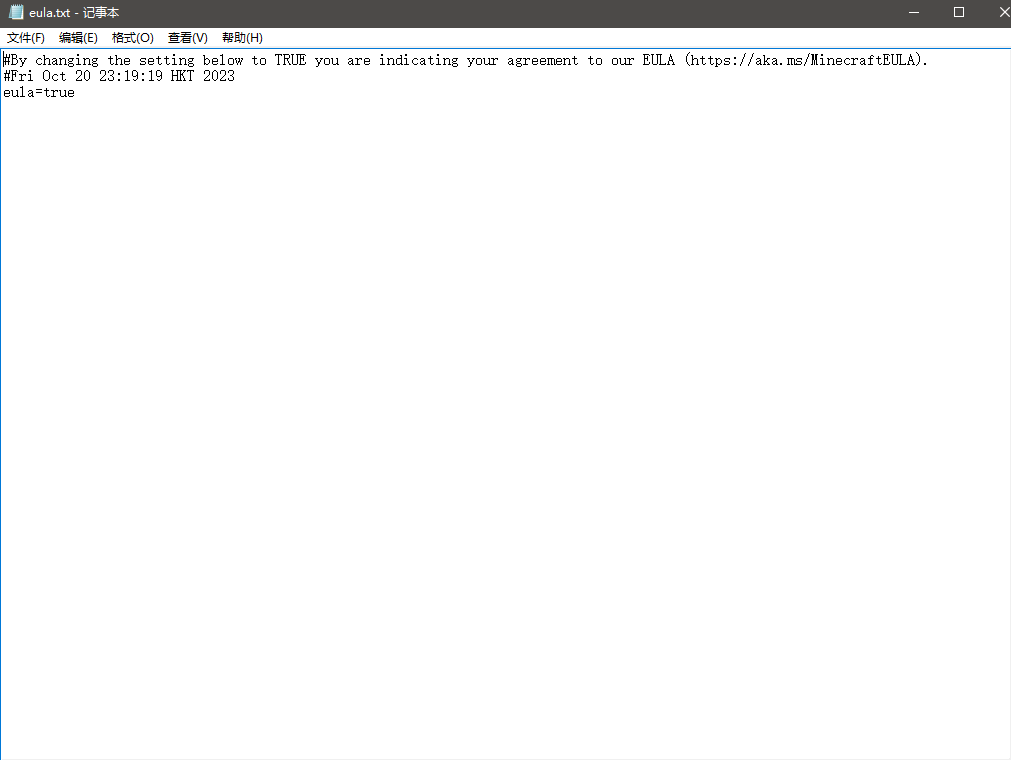
然后打开eula.txt,把里面的值改为true,保存,再次运行服务器核心
运行后会有这个页面,当你看到出现type 'help',即为开服成功,接下来输入(在右下角有个很长的白条输入框种输入)stop停止服务器

当然你也可以打开MC,选择多人游戏,直接连接/添加服务器,输入127.0.0.1,如果能进去,说明也是成功的,同理记得输入stop关闭服务器
④配置服务器:
关闭服务器后,在server文件夹下,找到server.properties文件,修改里面的配置,你需要重点留意下面几点:
配置中文大全:Minecraft 服务器server.properties属性文件
- server-port,服务器端口,默认25565,这是你服务器开放的端口号
- online-mode,服务器正版验证,看你个人需求true或者false
- enforce-secure-profile,聊天公钥,如果服务器不能聊天,请把这个改为false
- enable-rcon,RCON的启用,为了装插件,我们需要设置为true
- rcon.port,RCON端口,默认是25575,默认就行
- rcon.password,RCON密码,你随便弄一个,记住就行
配置MCDR
MCDR文档:
①安装Python:
本教程使用的是MCDR2.0的版本,需要Python3.8以上的版本,按要求挑一个3.8以上的版本即可,教程选择了3.11.0的版本

下载完毕后,双击,一直下一步即可傻瓜安装
安装完成后,打开cmd,输入python,出现下面字样即为成功:

②安装MCDR
==安装部分照搬文档内容,通常python安装的包会在C盘,请留意C盘空间,如果需要要换位置请自行解决==
当然,首先你需要在任意地方打开cmd,然后输入python,再进行下面的内容:
MCDR 已于 pypi 中发布,因此你可以通过 pip 命令来安装 MCDR:
Windows
pip install mcdreforgedLinux
对于国内用户,你可以在 pip 指令的末尾添加 -i https://pypi.tuna.tsinghua.edu.cn/simple 后缀来使用清华 pypi 镜像来加速 MCDR 的下载安装:
Windows
pip install mcdreforged -i https://pypi.tuna.tsinghua.edu.cn/simpleLinux
不要 直接下载 MCDR 的源代码并从中启动 MCDR,除非你是一个知道你自己在做什么的 MCDR 开发者
在使用 pip 安装 MCDR 后,你可以用以下指令来验证安装是否成功:
mcdreforged③配置MCDR环境
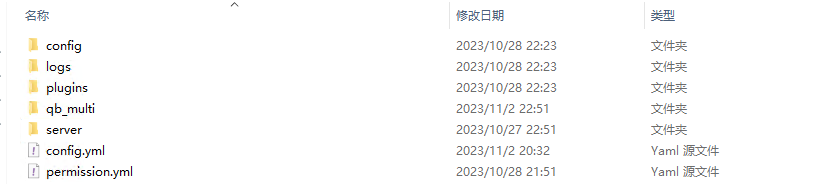
创建一个文件夹,我这里命名为MCDR,进入,然后按着shift+右键,选择在此处打开powershell窗口或者在此处打开命令窗口,输入以下命令:
mcdreforged init运行完成后,可以看到文件夹出现了如下内容:
然后打开config.yml文件,配置MCDR:
language,改为zh_cn
handler,按你服务端核心类型进行修改
encoding和decoding,如果不是utf8,则改为utf8即可
rcon配置如下:
yamlrcon: enable: true address: 127.0.0.1 port: 25575 password: # 前面配置MC服务器设置的密码start_command,服务器启动路径配置,如果你用的不是原版核心,请把
minecraft_server.jar改为你的核心名字:- 提醒,指向核心并且用MCDR启动后,下载核心所需的文件可能会比较久,耐心等待(中途可能会刷红色的ERROR,但是不必担心,等会就好!)~
yaml# 如果是核心直接开服,就这样 java -jar server.jar nogui # 如果是整合包,就找找服务器目录下面有没有run.bat或者start.bat,哪个能启动服务器,就填哪个 run.bat nogui # 或者 start.bat nogui # 加点参数,这里表示,最小使用1G内存,最大使用2G内存,nogui表示不要MC自己的服务端启动UI java -Xms1G -Xmx2G -jar minecraft_server.jar nogui # 指向你的Fabric核心 java -Xms1G -Xmx2G -jar fabric_minecraft.jar nogui
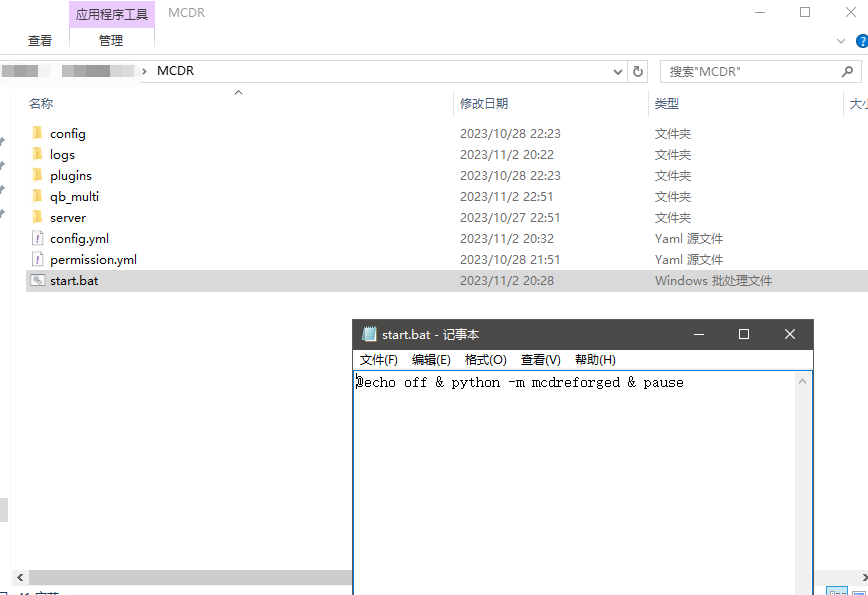
接着把之前运行服务端核心生成的全部文件,拖入到这里的server文件夹(MCDR是我们刚刚创建的文件夹)

接着回退到MCDR的文件夹中,选用下面两种方式进行启动:
脚本启动
新建一个文本文档,在里面写入:
shell@echo off & python -m mcdreforged & pause保存,然后重命名后缀为bat即可,双击即可运行脚本
命令行启动
在MCDR文件夹下,按住shift+右键,选择
在此处打开powershell窗口或者在此处打开命令窗口,输入以下命令即可启动:shellmcdreforged
开放公网访问
软件下载
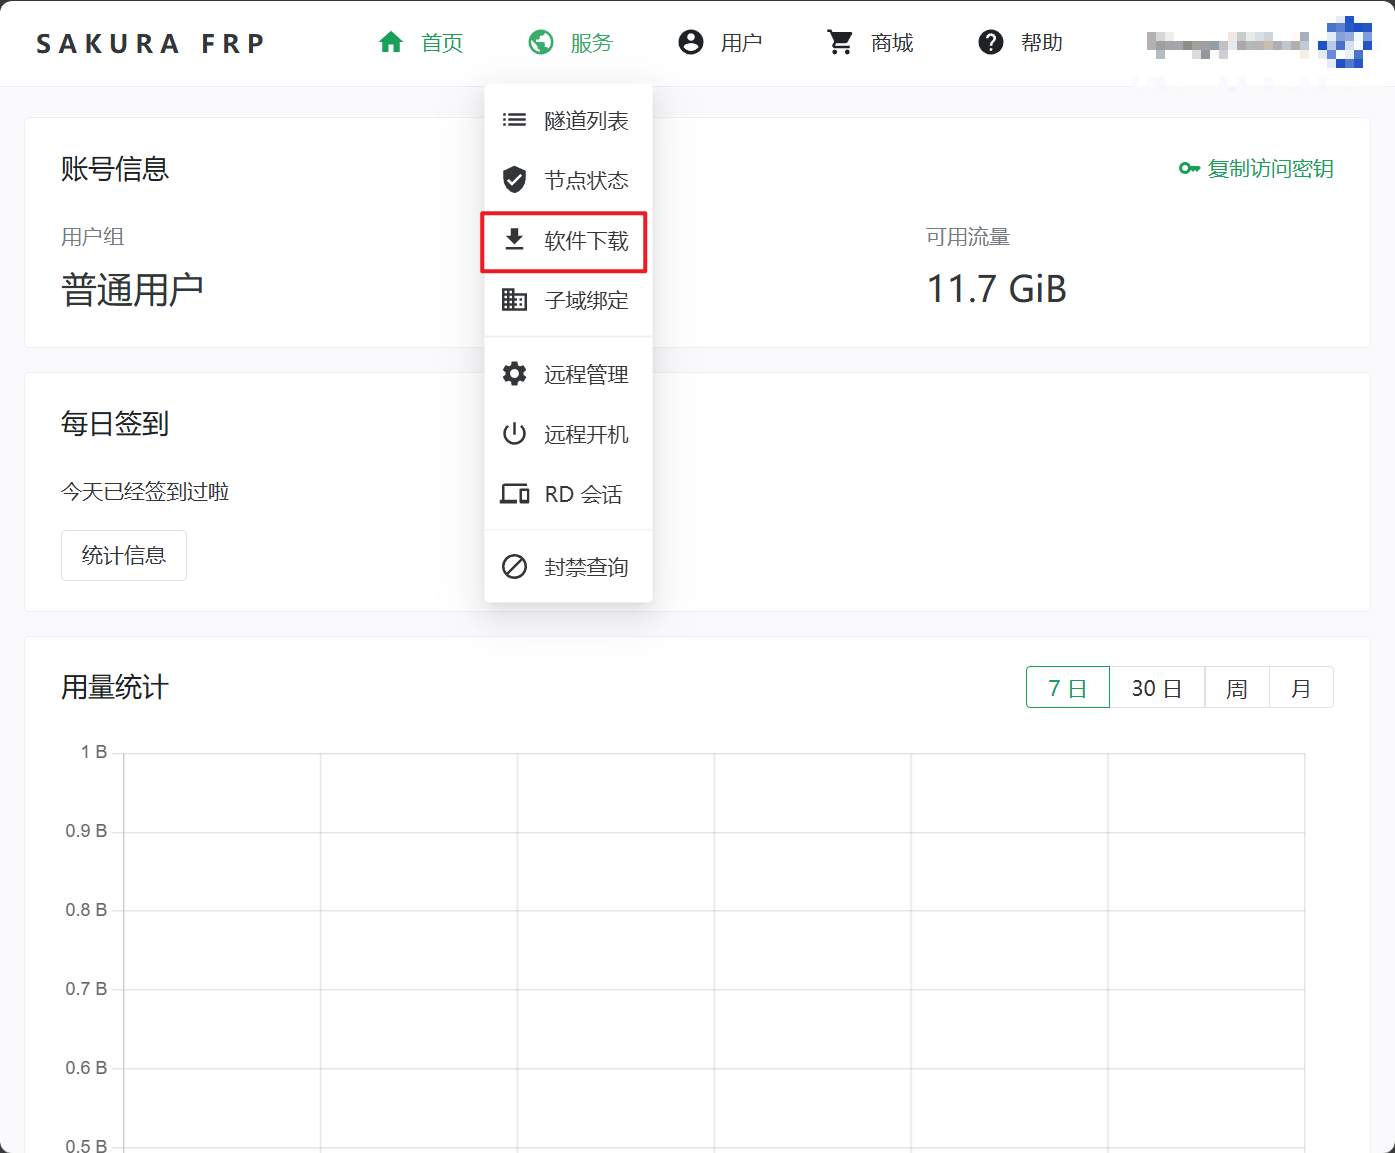
教程使用常见的映射工具:樱花映射来完成内外穿透,你可以点击这里进行下载
进入到页面后,点击箭头所指的位置进行软件下载,如果你还没有账号,请先自行注册,注册过程简单,不再啰嗦: 
下载页面讲的很详细了,就不过多说明了,我们用Windows做教程(至少25.3.23 21:17的时候,win11的机子需要通过powershell进行下载),这里需要使用powershell来完成下载,按下载的说明来操作就OK: 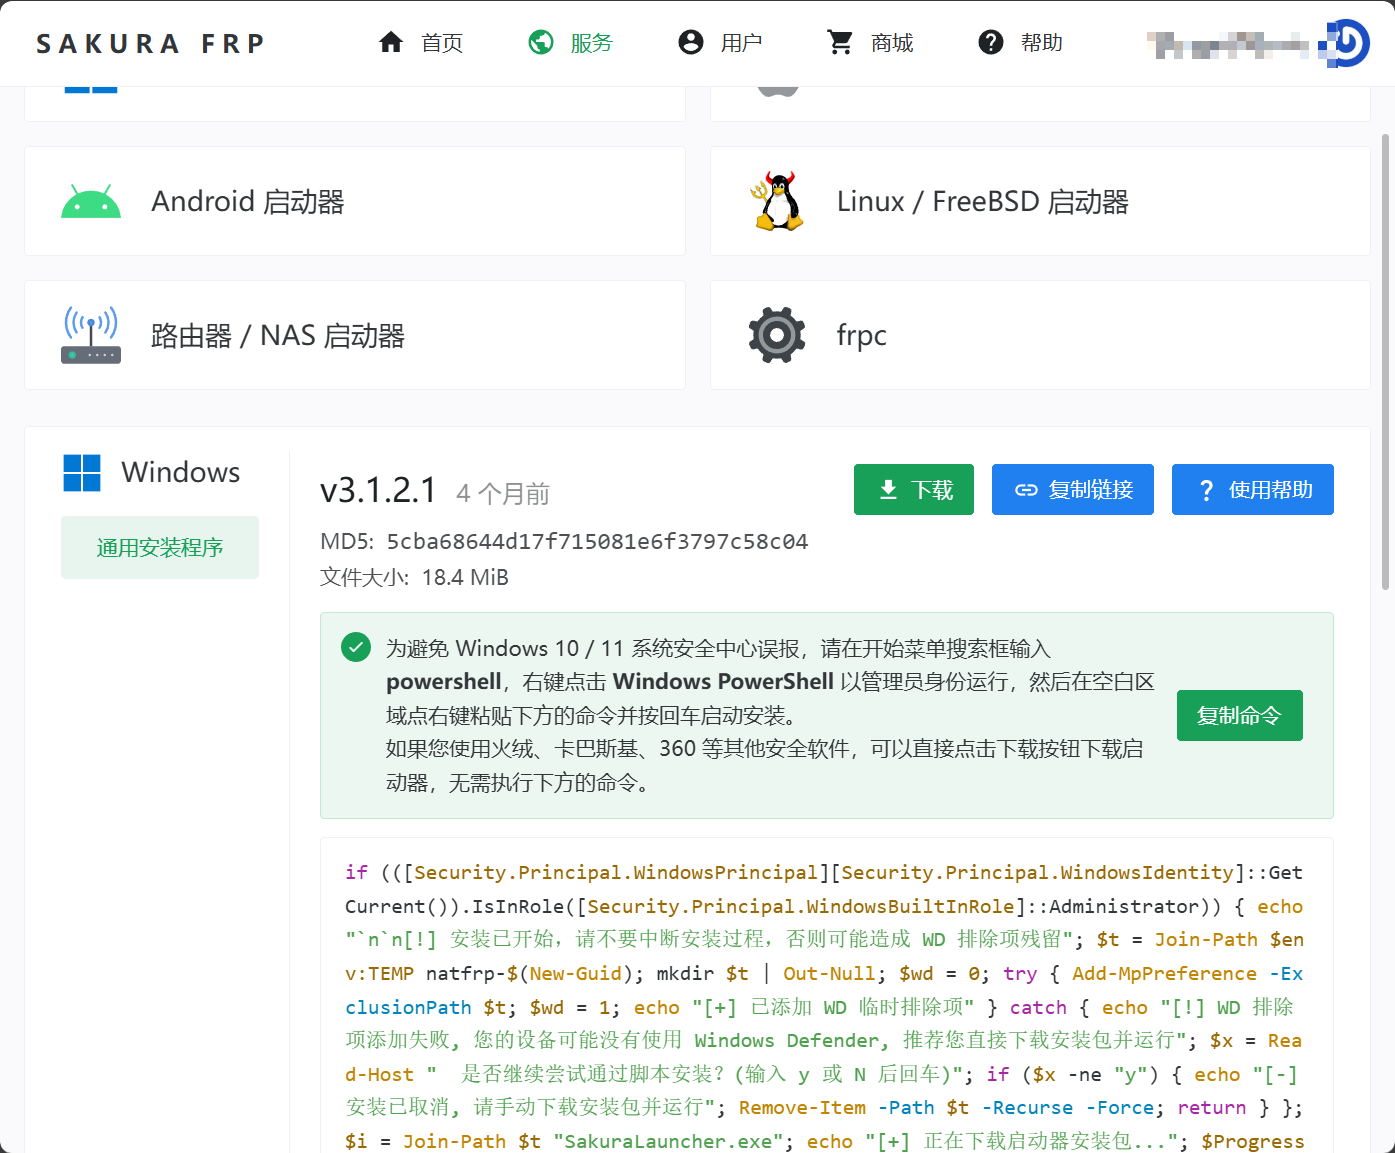
另外提醒一下,这玩意安装的时候不能手动改安装目录(想改的得自己折腾一下),强制在C盘的,对这个敏感的要留意一下,安装完成后打开页面,你会看到如下: 
登录
回到樱花映射的主页,点击这里复制你的访问密钥,然后放到你的启动器中,就能完成登录了! 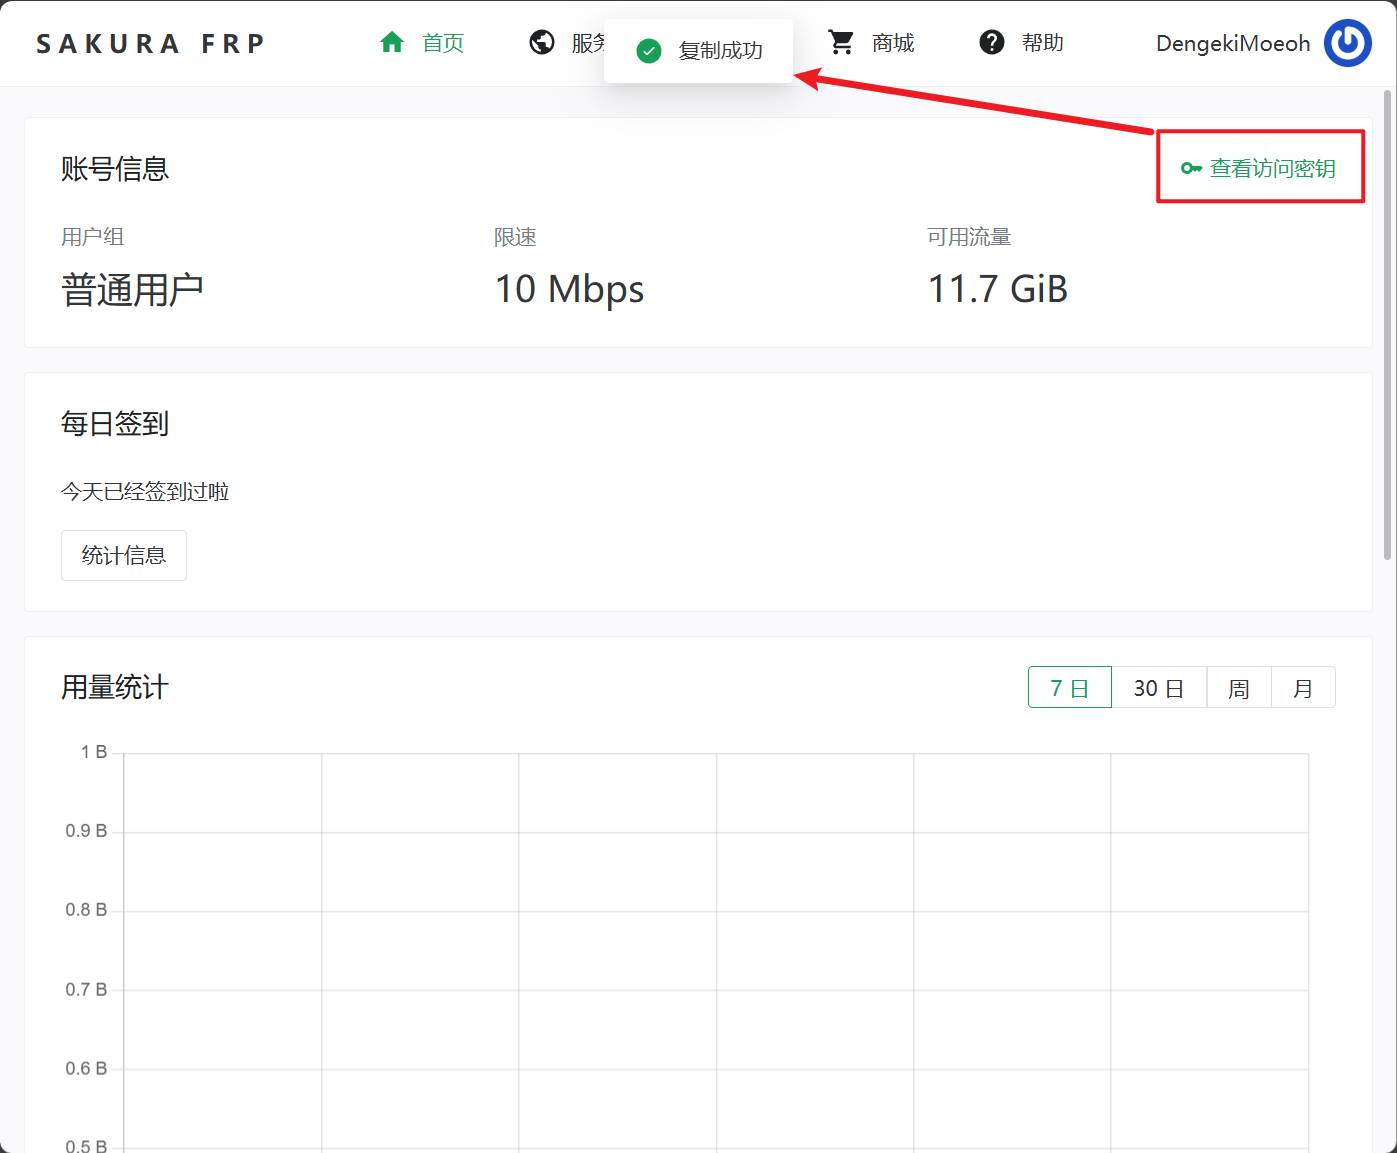
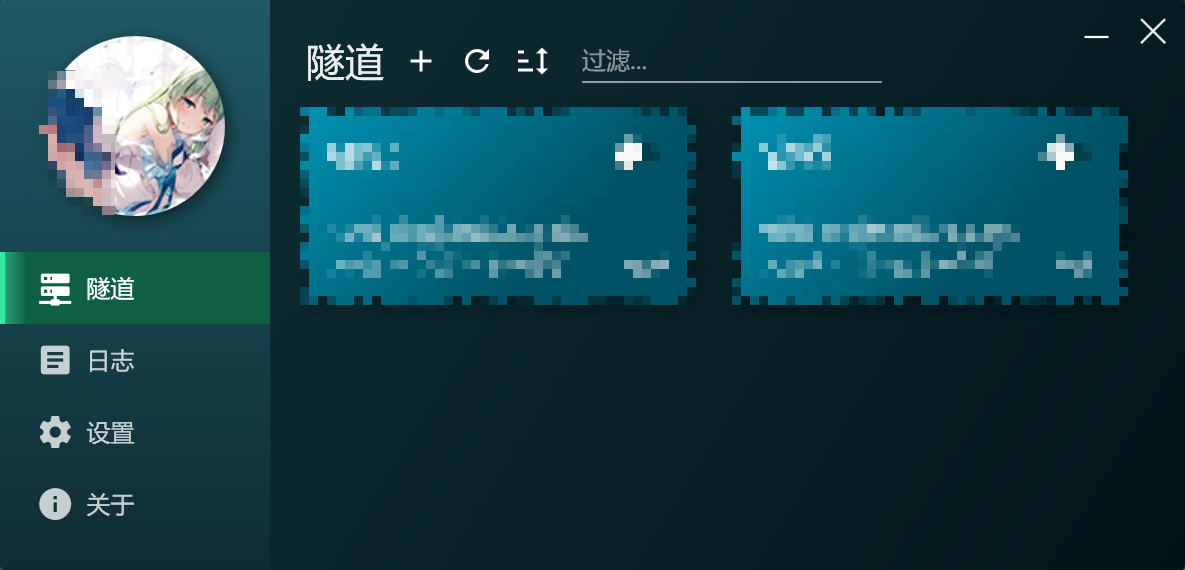
隧道配置
在软件的上的,隧道旁边点击+号,出现如下窗口,选择任意节点(我这里有青铜是因为我购买了10r/月的VIP,看着选,离自己进的传输肯定好一些,但是要留意节点人多就会很卡,节点情况可以去官网查看:点我前往查看节点情况): 
这里右上角选择TCP隧道,隧道名字任意,端口选你服务器的端口,点击创建即可完成 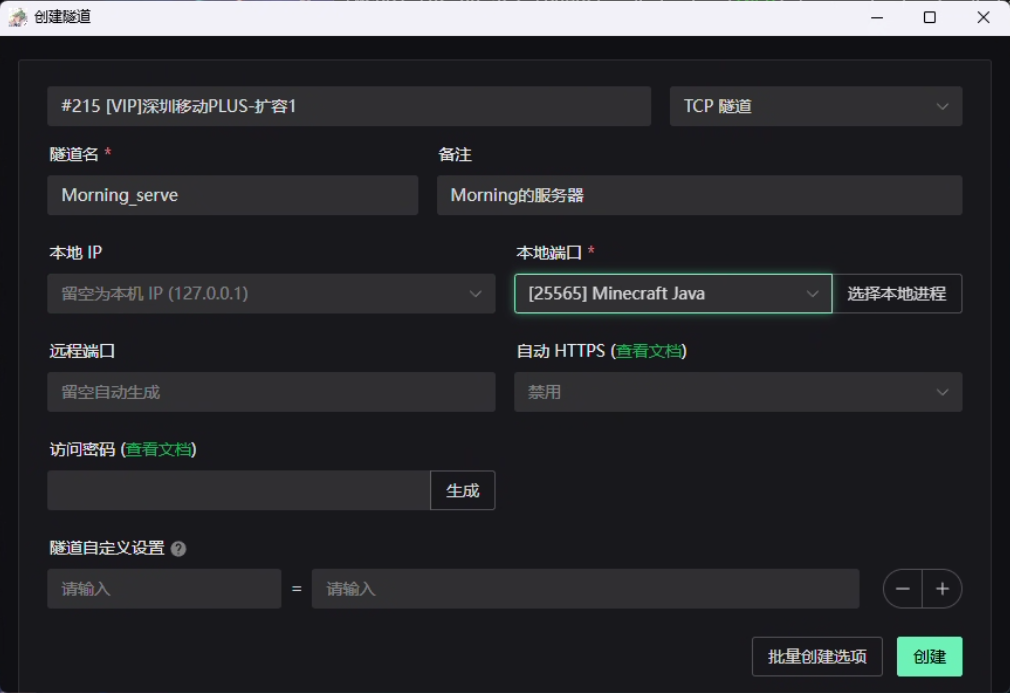
好了之后,回到启动器页面,找到你创建的隧道,点击右上角的按钮开启穿透,然后点击日志,获取域名或者IP地址,发给你的小伙伴即可成功联机! 
 这里需要注意的是,理论上穿透的IP和域名是不变的,但是如果换隧道了或者有一些奇怪的东西导致你连不上了,请回到日志中查看新的域名和IP!
Velocity使用
想要一个镜像服?群组服?没问题,教程都有,这里我们以开启一个镜像服作为演示,你可以参考教程开启多个服务器,只要你主机扛得住!
开始前,你需要了解:
- 多个服务器的搭建没啥区别的,本质上其实就是你按上面的步骤开了多个服务器罢了,记得每个服务器的端口要区分开,否则会端口占用而导致启动失败!
- 简单来说就是,你通过Velocity来访问你的服务器,Velocity上配置了所有服务器的端口,通过一些简单的指令可以直接跳转到别的服务器
看完我们就开始吧!同样的,我们以Fabric为教程例子!如果你想要开其他类型的,上官网,查看相关的指引就行:Velocity官网
Velocity的安装和准备工作
我们需要下载两个内容,一个是Velocity,另一个是fabricproxy-lite!
前往官网下载jar包:Velocity下载
通常直接下最新的就行,如果你有其他需要,可以下滑查看其他的版本: 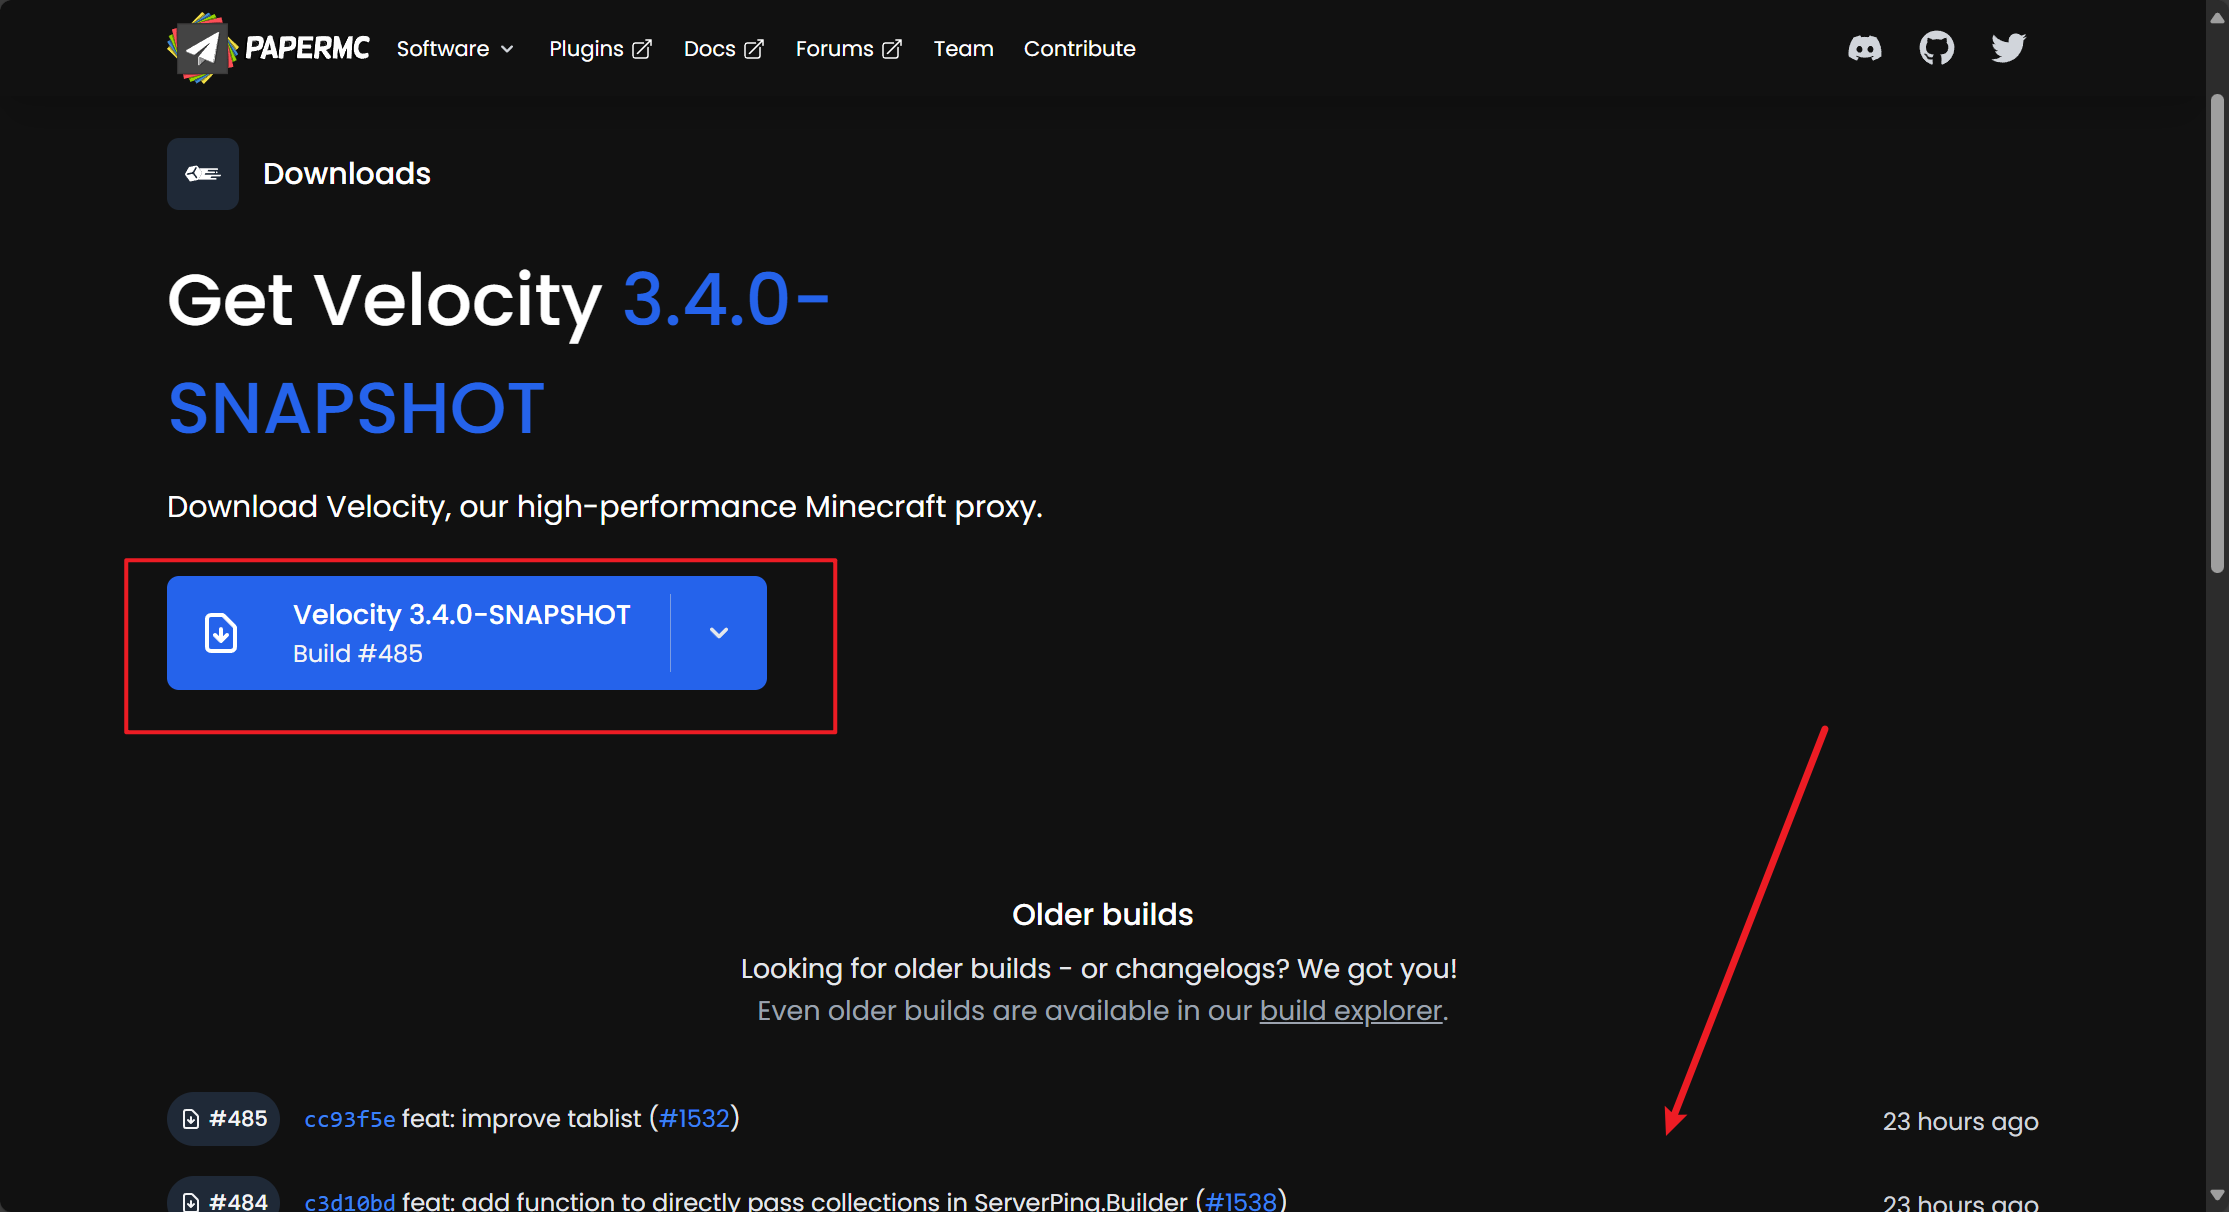
前往Modrinth下载:fabricproxy-lite下载
Velocity下载完成后,找个新的文件夹把它丢进去,然后新建一个txt文本命名为start,并往里面写入,其中velocity-3.3.0-SNAPSHOT-398.jar为你的Velocity核心名字:
@echo off
java -jar velocity-3.3.0-SNAPSHOT-398.jar

# 如果你想进一步优化,你可以使用:
@echo off
java -Xms1024M -Xmx1024M -jar velocity-3.3.0-SNAPSHOT-398.jar然后把这个文本的txt后缀改为bat,接着双击启动这个bat,在弹出的窗口加载完内容后,输入end关掉,此时,会生成大致如下的内容: 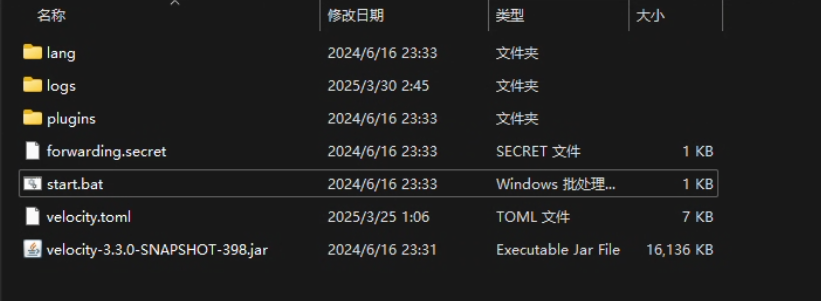
接着打开velocity.toml文件,我们一个个看着来配置,英文为原本文件的注释,中文是我的补充说明,非常不推荐全部CV进去...:
# Config version. Do not change this
# 不用管
config-version = "2.7"

# What port should the proxy be bound to? By default, we'll bind to all addresses on port 25577.
# 代理应该绑定到哪个端口?随便写,别和服务器重复就行,这个要记住!
bind = "0.0.0.0:25585"

# What should be the MOTD? This gets displayed when the player adds your server to
# their server list. Only MiniMessage format is accepted.
# 你可以理解为服务器列表下二级标题的描述,注意这里只接受MiniMessage格式
motd = "\u662fumr\u7684\u670d\u52a1\u5668\u557e\uff01"

# What should we display for the maximum number of players? (Velocity does not support a cap
# on the number of players online.)
# 显示服务器最大人数(注意这里是显示,不是限制)
show-max-players = 8

# Should we authenticate players with Mojang? By default, this is on.
# 正版验证,自己看着来
online-mode = true

# Should the proxy enforce the new public key security standard? By default, this is on.
# 是否强制执行公钥安全标准?默认就行,有问题你再排查取反就好
force-key-authentication = false

# If client's ISP/AS sent from this proxy is different from the one from Mojang's
# authentication server, the player is kicked. This disallows some VPN and proxy
# connections but is a weak form of protection.
# 不用管,默认false就行
prevent-client-proxy-connections = false

# Should we forward IP addresses and other data to backend servers?
# Available options:
# - "none":        No forwarding will be done. All players will appear to be connecting
#                  from the proxy and will have offline-mode UUIDs.
# - "legacy":      Forward player IPs and UUIDs in a BungeeCord-compatible format. Use this
#                  if you run servers using Minecraft 1.12 or lower.
# - "bungeeguard": Forward player IPs and UUIDs in a format supported by the BungeeGuard
#                  plugin. Use this if you run servers using Minecraft 1.12 or lower, and are
#                  unable to implement network level firewalling (on a shared host).
# - "modern":      Forward player IPs and UUIDs as part of the login process using
#                  Velocity's native forwarding. Only applicable for Minecraft 1.13 or higher.
# 这里要留意,1.12-就用"legacy",或者"bungeeguard",1.13+就用"modern",教程是1.20+的,所以这里用"modern"!
player-info-forwarding-mode = "modern"

# If you are using modern or BungeeGuard IP forwarding, configure a file that contains a unique secret here.
# The file is expected to be UTF-8 encoded and not empty.
# 密钥文件,不用管
forwarding-secret-file = "forwarding.secret"

# Announce whether or not your server supports Forge. If you run a modded server, we
# suggest turning this on.
#
# If your network runs one modpack consistently, consider using ping-passthrough = "mods"
# instead for a nicer display in the server list.
# Forge的建议设为true,我们是Fabric,默认false就行,翻译是:
# 宣布你的服务器是否支持Forge。如果你运行一个模组服务器,我们建议开启这个。
# 如果你的网络持续运行一个模组包,考虑使用ping-passthrough = "mods"代替,以便在服务器列表中更好地显示。
announce-forge = false

# If enabled (default is false) and the proxy is in online mode, Velocity will kick
# any existing player who is online if a duplicate connection attempt is made.
# 不管
kick-existing-players = false

# Should Velocity pass server list ping requests to a backend server?
# Available options:
# - "disabled":    No pass-through will be done. The velocity.toml and server-icon.png
#                  will determine the initial server list ping response.
# - "mods":        Passes only the mod list from your backend server into the response.
#                  The first server in your try list (or forced host) with a mod list will be
#                  used. If no backend servers can be contacted, Velocity won't display any
#                  mod information.
# - "description": Uses the description and mod list from the backend server. The first
#                  server in the try (or forced host) list that responds is used for the
#                  description and mod list.
# - "all":         Uses the backend server's response as the proxy response. The Velocity
#                  configuration is used if no servers could be contacted.
# 不用管,问你传不传ping请求而已,你可以默认“disabled”
# 这里必须说明一下,如果你要用自己服务器的信息而不是Velocity的,你这里要选“all”,否则读取不到你的服务器信息和icon,具体看下面的疑难解答!
ping-passthrough = "all"

# If not enabled (default is true) player IP addresses will be replaced by <ip address withheld> in logs
# 不用管,默认true
enable-player-address-logging = true

[servers]
# Configure your servers here. Each key represents the server's name, and the value
# represents the IP address of the server to connect to.
# 关键来了,这里就是配置你所有Velocity能连接的服务器的地方,我们这里就先配置两个,survival和mirror,这是服务器名字(你可以用中文,记得用英文的双引号包裹,当然,不推荐用中文),后面是地址!
survival = "127.0.0.1:25565"
mirror = "127.0.0.1:25566"
# create = "127.0.0.1:25567"
# minigames = "127.0.0.1:30068"

# In what order we should try servers when a player logs in or is kicked from a server.
# 当玩家登录或从服务器被踢出时,我们应该尝试让他进入哪个服务器?越前越先被选择,如果都可用的话
try = [
    "survival",
    "mirror",
    "create"
]

[forced-hosts]
# Configure your forced hosts here.
# 不管,应该是配置强制主机地址什么的
"survival.example.com" = [
    "survival"
]
"mirror.example.com" = [
    "mirror"
]
"create.example.com" = [
    "create"
]
# "minigames.example.com" = [
#     "minigames"
# ]

[advanced]
# How large a Minecraft packet has to be before we compress it. Setting this to zero will
# compress all packets, and setting it to -1 will disable compression entirely.
# 不管,默认256,这是设置数据包超过多少才会压缩
compression-threshold = 256

# How much compression should be done (from 0-9). The default is -1, which uses the
# default level of 6.
# 不管,默认-1,这是设置压缩效率,默认是压缩效率6
compression-level = -1

# How fast (in milliseconds) are clients allowed to connect after the last connection? By
# default, this is three seconds. Disable this by setting this to 0.
# 不管,默认是3000,这是客户端在上次连接后允许多快连接,默认是3000,设置为0可禁用此功能。
login-ratelimit = 3000

# Specify a custom timeout for connection timeouts here. The default is five seconds.
# 不管,默认5000,这是链接超时的自定义时间
connection-timeout = 5000

# Specify a read timeout for connections here. The default is 30 seconds.
# 不管,默认30000,这是链接读取超时时间
read-timeout = 30000

# Enables compatibility with HAProxy's PROXY protocol. If you don't know what this is for, then
# don't enable it.
# 不知道,不管,默认false
haproxy-protocol = false

# Enables TCP fast open support on the proxy. Requires the proxy to run on Linux.
# 开TCP的,不管,默认false
tcp-fast-open = false

# Enables BungeeCord plugin messaging channel support on Velocity.
# 消息传输通道支持?不管,默认true
bungee-plugin-message-channel = true

# Shows ping requests to the proxy from clients.
# 不管,显示ping的,默认false
show-ping-requests = false

# By default, Velocity will attempt to gracefully handle situations where the user unexpectedly
# loses connection to the server without an explicit disconnect message by attempting to fall the
# user back, except in the case of read timeouts. BungeeCord will disconnect the user instead. You
# can disable this setting to use the BungeeCord behavior.
# 不管,默认true
failover-on-unexpected-server-disconnect = true

# Declares the proxy commands to 1.13+ clients.
# 对1.13+客户端声明代理命令,不管,默认true
announce-proxy-commands = true

# Enables the logging of commands
# 命令日志记录,不管,默认false
log-command-executions = false

# Enables logging of player connections when connecting to the proxy, switching servers
# and disconnecting from the proxy.
# 也是日志,不管,默认true
log-player-connections = true

# Allows players transferred from other hosts via the
# Transfer packet (Minecraft 1.20.5) to be received.
# 不管,默认为false,说是允许通过Transfer数据包(Minecraft 1.20.5)从其他主机传输的玩家被接收。
accepts-transfers = false

[query]
# Whether to enable responding to GameSpy 4 query responses or not.
# 不管,默认false
enabled = false

# If query is enabled, on what port should the query protocol listen on?
# 不管,上面enabled为false这个值无效
port = 2525585577

# This is the map name that is reported to the query services.
# 不管,说是查询的报告名字,上面enabled为false这个值无效
map = "UMR"

# Whether plugins should be shown in query response by default or not
# 不管,默认为false,指是否应该在查询响应中显示插件,上面enabled为false这个值无效
show-plugins = false按上面的说明,配置好你的toml文件,然后找到你的两个服务器,把下载好的fabricproxy-lite的mod放到这些服务器的mods文件夹下,然后每个服务区都启动一次, 接着在你的server/config下找到FabricProxy-Lite.toml文件,内容大致是:
hackOnlineMode = true
hackEarlySend = true
hackMessageChain = true
disconnectMessage = "您不允许直接连接到此服务器!"
secret = "11111"快速说明一下:
- hackOnlineMode,这个应该是正版的问题,自己决定
- hackEarlySend,默认就行
- hackMessageChain,默认就行
- disconnectMessage,一般来说配置了Velocity后,配置好的服务器是不能直接被链接的,如果直接被链接,就会弹出这里的文本
- secret,密钥,位置在你放置Velocity文件夹下的
forwarding.secret下,直接打开,里面就一串文本,复制粘贴过来替换掉111就行,记得双引号是必须的!
装插件
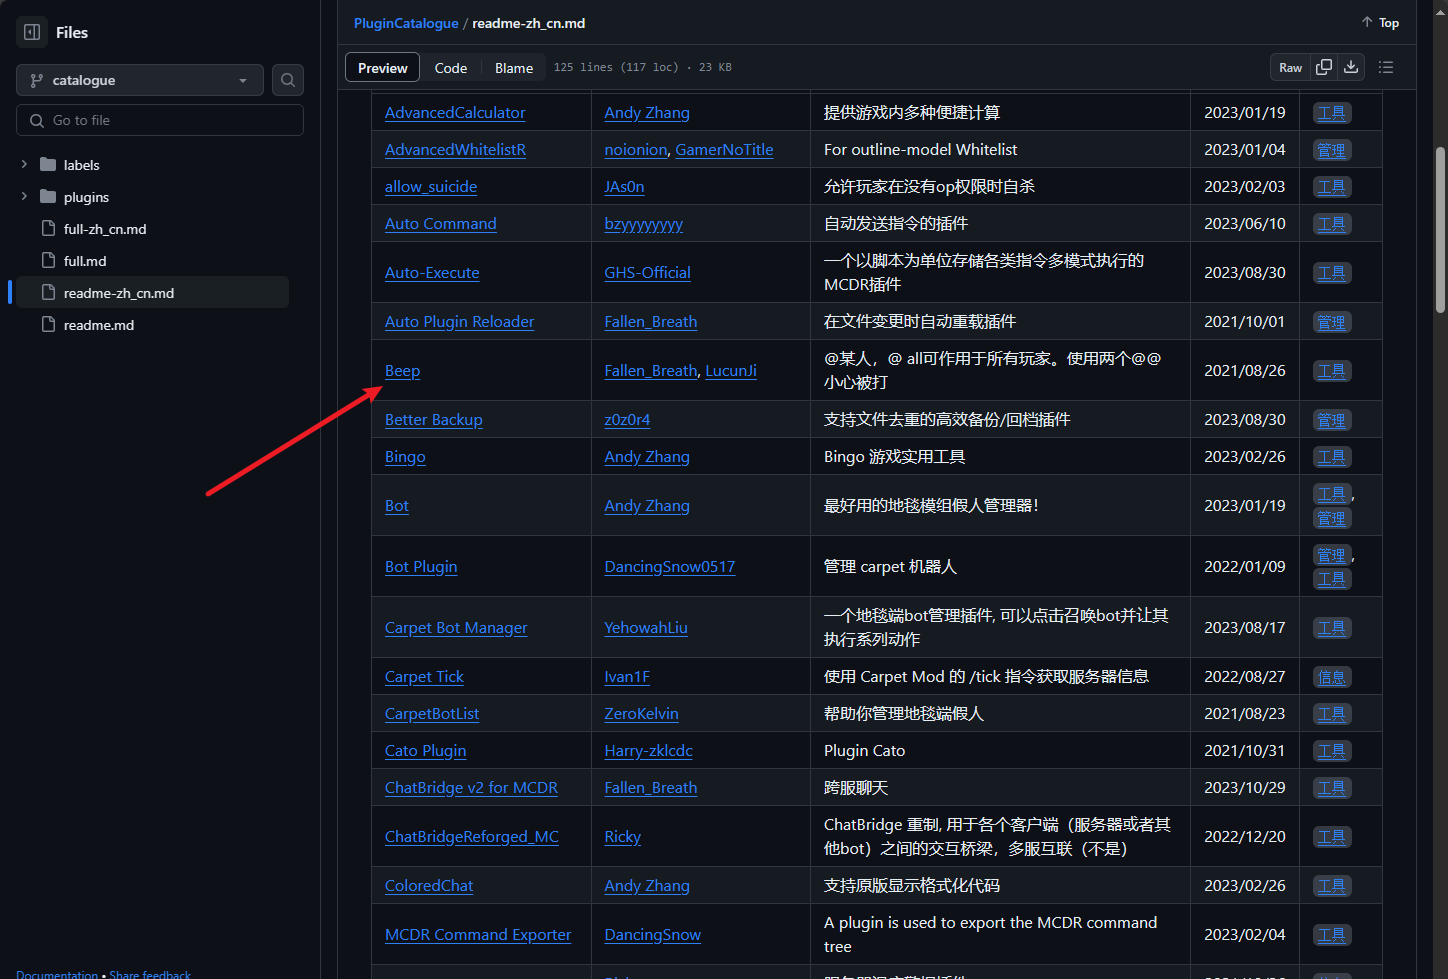
MCDR插件仓库:点我
装
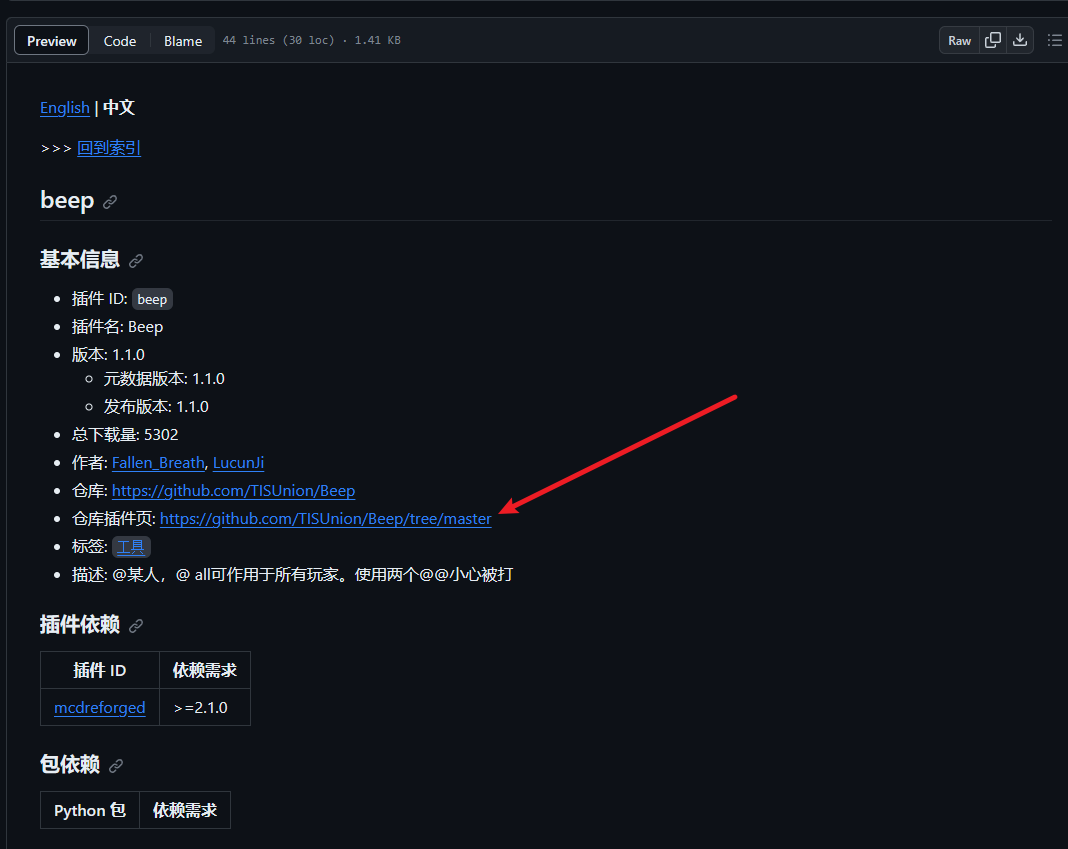
里面包含了可以使用的插件,这里我们以Beep插件为例子
点进去后,查看插件依赖和包依赖
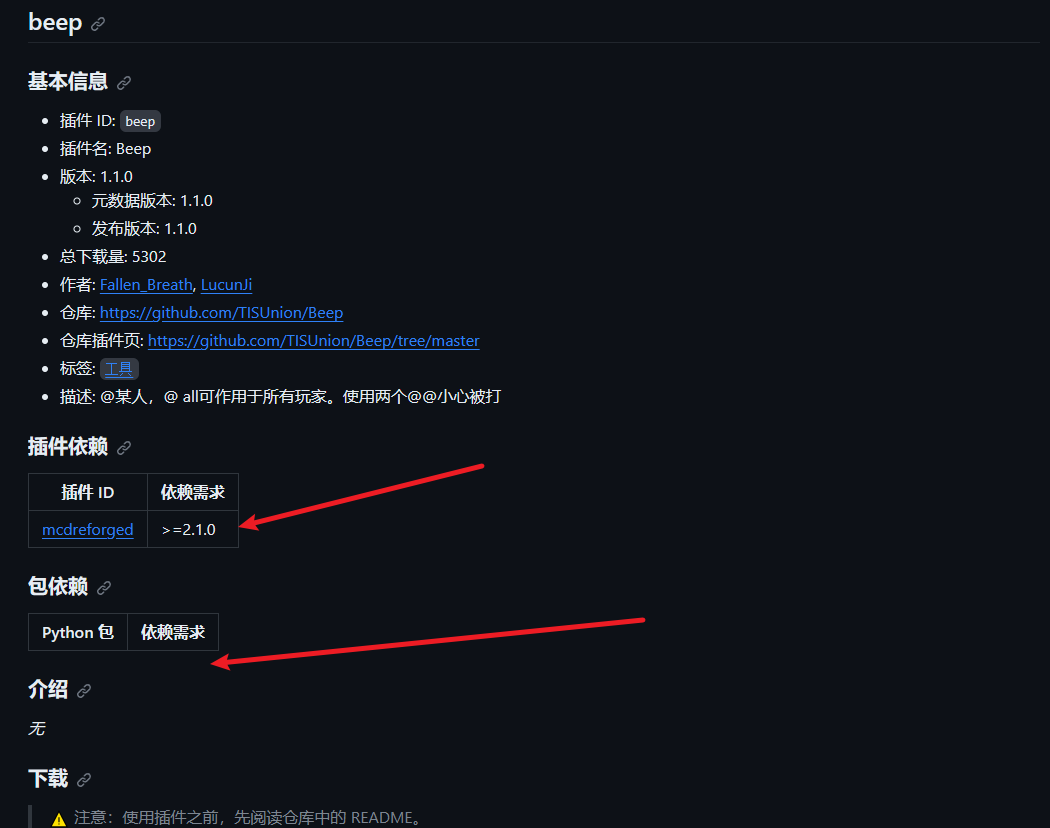
确定自己的版本和包的依赖需求正确,以及包依赖都安装了,如果你包依赖不知道装没装,请使用下面的命令进行测试和安装:
首先你需要在任意地方打开cmd,然后输入下面的代码:
# 检查包是否存在,其中packer为包名字
pip show package

# 其中packer为包名字,version为包依赖需求,有些包需要指定依赖版本,如果无指定,可以直接使用第二行的来安装最新的
pip install package==version	# 第一行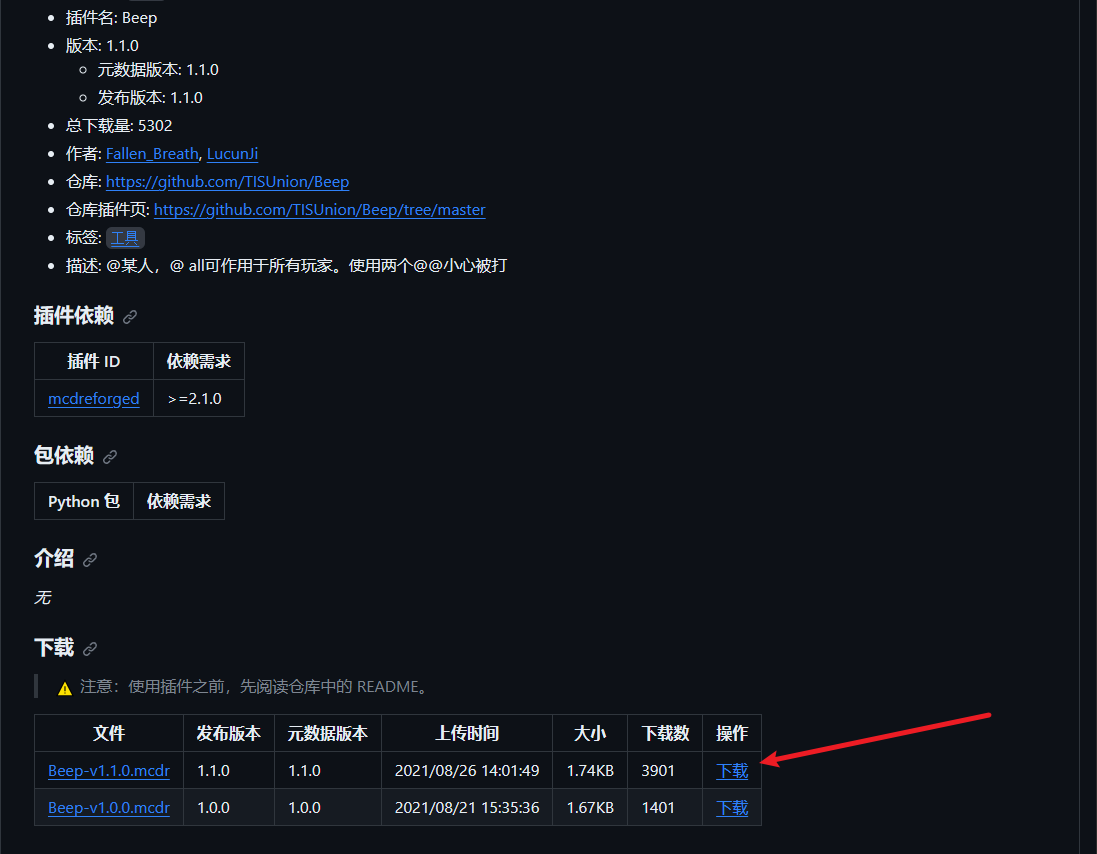
pip install package # 第二行选择最新的插件进行下载:
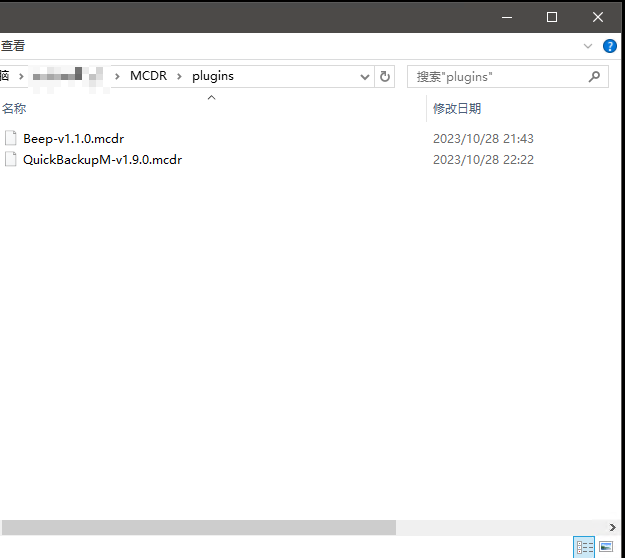
然后放到MCDR文件夹下的plygins即可,接着重启服务器(如果你服务器在运行,可以在服务端输入!!MCDR r pls进行热重载)
用
如果你不会用,老规矩,我们回到这里,点开仓库标签页
这样我们就可以看到它如何使用了:

插件权限
有些插件是有权限的,例如:Quick Backup Multi

我们进入到他的仓库插件页,滑到最下面,可以看到:
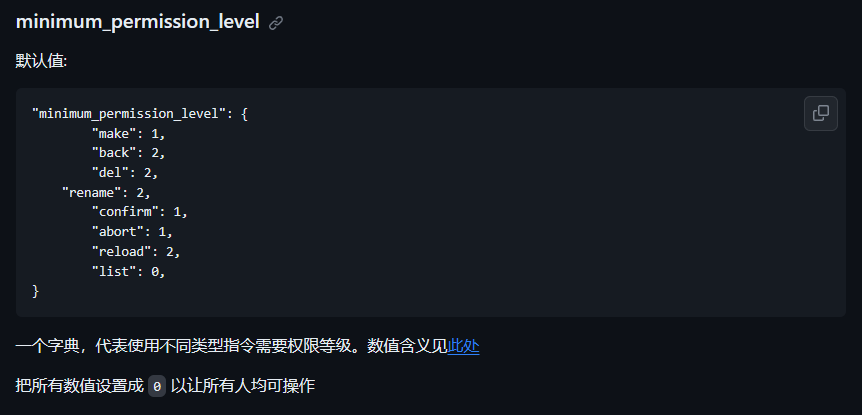
这里标明了这个插件可以给哪些权限等级的人使用,关于权限等级,你可以在同MCDR的config.yml文件夹下找到名为permission.yml文件,打开它

同时这里提供一份MCDR文档的说明,自行阅读匹配:

疑难解答
Q:用Velocity后,服务器列表显示不出来我的服务器信息和icon?
A:两种方法:
1. 把ping-passthrough设置为"all",然后重启Velocity;
2. 把ping-passthrough设置为"disabled",让Velocity代理信息,在配置文件的motd编写你的服务器介绍,把`server-icon.png`放到你的Velocity.jar同级目录下即可;【个人推荐】

* 注意:在Velocity下输入motd,你需要用以下格式编写minimessage:
`motd = "<aqua><bold>==========→</bold></aqua><gold><bold>是 awa 的服务器啾!</bold></gold><aqua><bold>←==========</bold></aqua>\n<yellow><bold>版本:26.1</bold></yellow>"`

* 如果你是用服务器文件`server.properties`的信息,那么你就需要用到特殊符号`§`:
`motd=§b§l==========→§6§l是 awa 的服务器啾!§b§l←==========\n§e§l版本:26.1`